
Cell Dilution Calculator
Find how much cell suspension and fresh medium you need – instantly.
Your Results
Enter your values and press Calculate to see the volume of cell suspension and medium to mix.
What Is a Cell Dilution Calculator?
A cell dilution calculator is a lab tool that tells you exactly how much concentrated cell suspension to take and how much fresh medium to add to reach a target cell density. After counting cells with a hemocytometer or an automated counter, you usually have far more cells per mL than an experiment needs. Instead of working out the math by hand every time, you enter three numbers and get the stock volume, medium volume and dilution factor in seconds.
Our tool has two modes. Dilute a Cell Suspension uses the classic C1V1 = C2V2 equation for any cell culture dilution. Seed a Well Plate works backward from the cells and volume you want in each well, so it doubles as a cell seeding calculator for 6-, 24-, 96- or 384-well plates.
How to Use the Cell Dilution Calculator
Mode 1: Dilute a cell suspension
- Enter your stock concentration (C1) in cells/mL – the number from your cell count.
- Enter the desired concentration (C2) you need for the experiment.
- Enter the final volume (V2) and choose mL, µL or L.
- Press Calculate. You will see the volume of cell suspension to pipette, the medium to add, the dilution factor and the total number of cells in the tube.
Mode 2: Seed a well plate
- Enter the stock concentration from your count.
- Add the number of cells you want in each well and the volume per well.
- Enter how many wells you are plating and an extra margin (10% is typical).
- Press Calculate to get the working concentration, total master-mix volume, stock volume and medium volume.
Cell Dilution Formula (C1V1 = C2V2)
Every cell dilution calculator is built on the same conservation rule: the number of cells you take from the stock equals the number of cells in the final tube.
C1 × V1 = C2 × V2so
V1 = (C2 × V2) ÷ C1- C1 – concentration of the stock cell suspension (cells/mL)
- V1 – volume of stock suspension you need to take
- C2 – final, desired concentration (cells/mL)
- V2 – final total volume
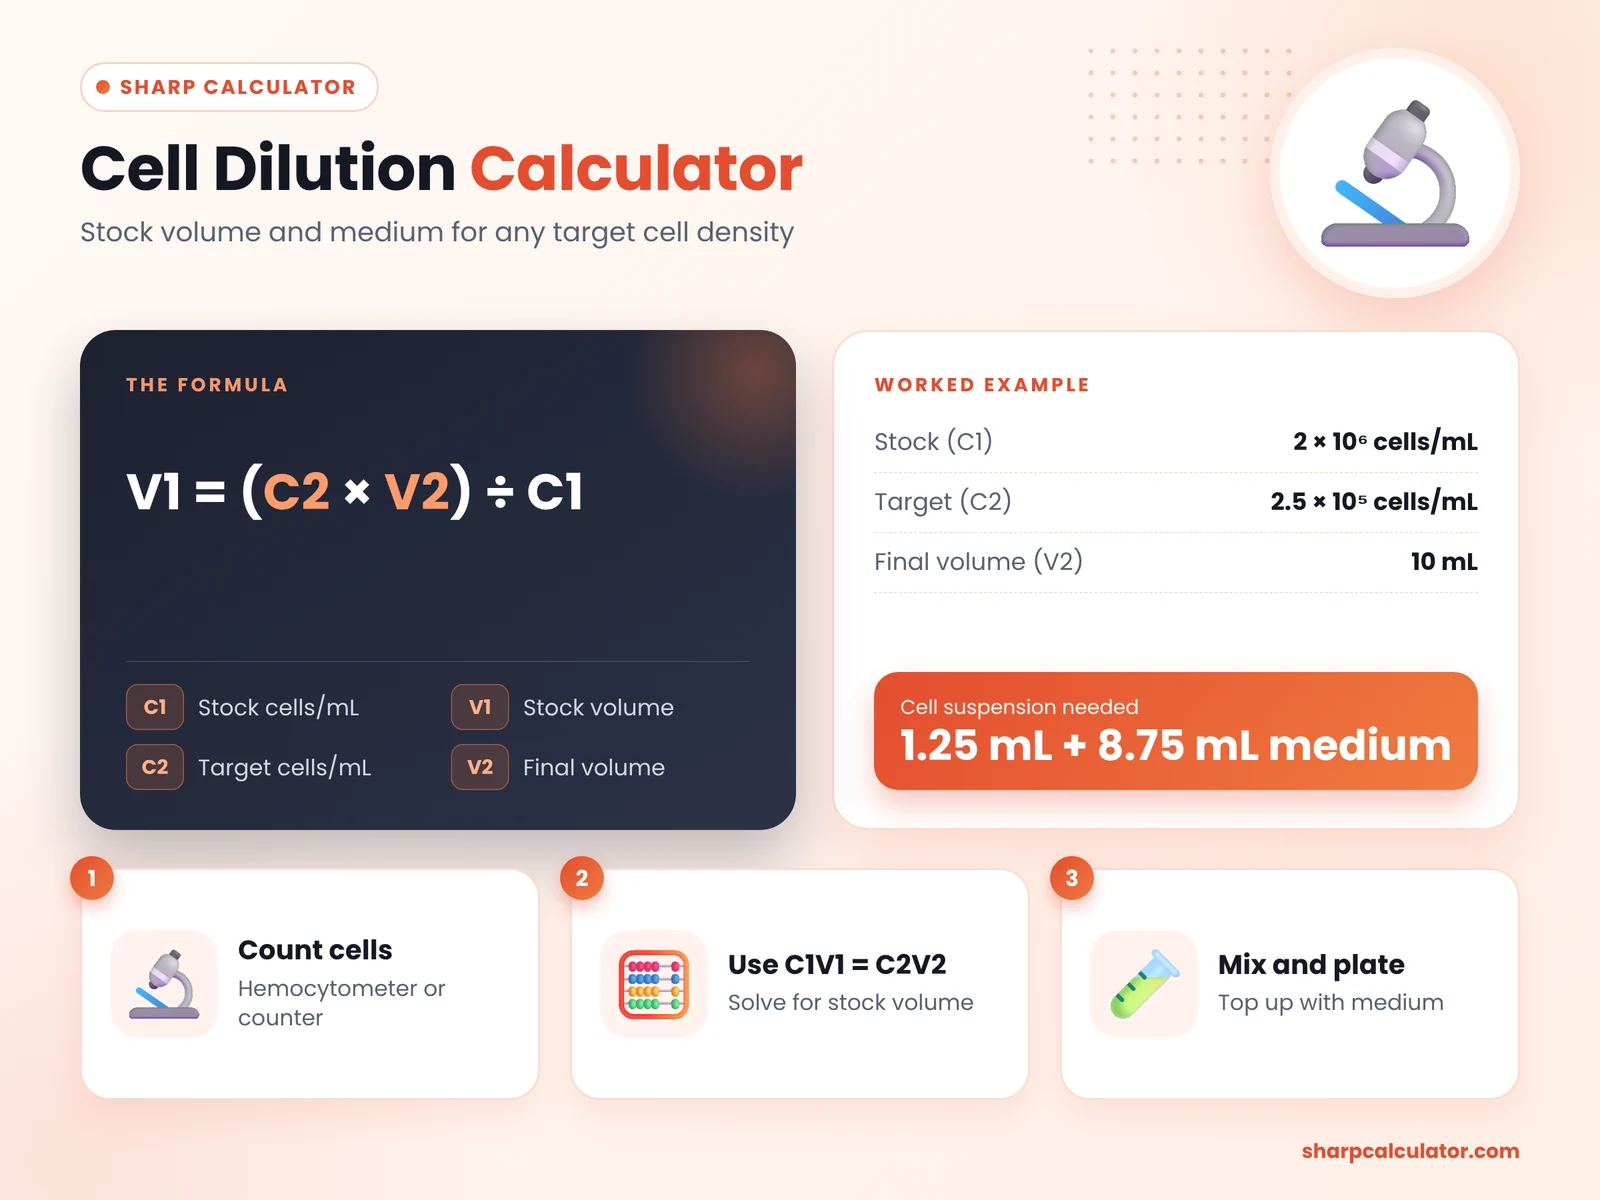
The volume of medium to add is simply V2 − V1, and the dilution factor is C1 ÷ C2. For plate seeding, the working concentration is cells per well ÷ volume per well, and the total volume is volume per well × number of wells × (1 + extra %).
Worked example
You counted 2 × 10⁶ cells/mL and need 10 mL at 2.5 × 10⁵ cells/mL.
V1 = (2.5 × 10⁵ × 10 mL) ÷ 2 × 10⁶ = 1.25 mL of cell suspension. Add 10 − 1.25 = 8.75 mL of medium. The dilution factor is 8 (a 1:8 dilution), and the tube holds 2.5 million cells in total.
Common Seeding Densities (Quick Reference)
Typical working volumes and starting densities for adherent cells are shown below. Optimal numbers depend on the cell line, growth rate and assay, so treat these as starting points and adjust from your own data.
Fast-growing lines such as HEK293 or HeLa are usually seeded at the lower end of each range, while slow-growing primary cells may need more. Always check the plate under the microscope a few hours after seeding to confirm even distribution and attachment.
When moving to a new plate format, scale the cell number by the growth area rather than the volume. A 96-well plate has about 0.32 cm² per well, a 24-well plate about 1.9 cm² and a 6-well plate about 9.5 cm², so cells per square centimetre stays the same while the totals change. Use the seed-a-plate mode above to turn your chosen density into a ready-to-pipette master mix.
| Plate format | Working volume per well | Typical cells per well |
|---|---|---|
| 6-well | 2 – 3 mL | 1 × 10⁵ – 3 × 10⁵ |
| 12-well | 1 – 2 mL | 5 × 10⁴ – 1.5 × 10⁵ |
| 24-well | 0.5 – 1 mL | 2.5 × 10⁴ – 7.5 × 10⁴ |
| 96-well | 100 – 200 µL | 5 × 10³ – 2 × 10⁴ |
| 384-well | 25 – 50 µL | 1 × 10³ – 5 × 10³ |
Tips for Accurate Cell Dilutions
- Mix before you count and before you pipette. Cells settle within minutes. Gently pipette up and down or invert the tube so every draw contains the same density.
- Count live cells. Use trypan blue or another viability stain and enter the viable cells/mL, not the total count, unless your protocol says otherwise.
- Average several counts. Counting at least two hemocytometer chambers reduces random error, which directly affects the volume you calculate.
- Avoid tiny pipetting volumes. If V1 is below about 2 µL, do a serial dilution (for example 1:10 first) so you pipette larger, more accurate volumes.
- Keep units consistent. Concentrations must share the same unit, and volumes must be in the same unit before you multiply. The calculator converts µL, mL and L for you.
- Prepare a little extra. Dead volume in tubes and reservoirs is real; a 5–10% margin prevents running out on the last row of a plate.
- Work quickly and warm. Use pre-warmed medium and plate soon after dilution to protect viability and keep cells evenly suspended.
Why Accurate Cell Concentration Matters
Seeding density shapes almost every downstream result. Too few cells can lead to slow growth and poor signal in viability or proliferation assays, while too many can cause over-confluence, nutrient depletion and contact inhibition. Consistent cell numbers between wells, plates and experimental days also make your replicates comparable and your data more reproducible. Using a reliable cell dilution calculator removes arithmetic mistakes, which are one of the most common – and most avoidable – sources of variation in cell culture work.
Who Can Use This Tool?
The calculator is useful for biology and biotechnology students, research technicians, cell culture scientists, microbiologists preparing suspensions, and teachers demonstrating the C1V1 = C2V2 relationship. It is free, works on mobile and desktop, and needs no sign-up.
Note: This cell dilution calculator is intended for educational and research planning. Always follow your laboratory’s validated protocols, and double-check critical calculations before running an experiment.
Frequently Asked Questions
How do I calculate cell dilution?
Use C1V1 = C2V2. Multiply the desired concentration by the final volume, then divide by the stock concentration to get the volume of cell suspension (V1). Subtract V1 from the final volume to find how much medium to add.
What is the dilution factor in cell culture?
The dilution factor is the stock concentration divided by the final concentration (C1 ÷ C2). A factor of 10 means a 1:10 dilution – one part cell suspension in ten parts total volume.
How many cells should I seed per well in a 96-well plate?
Many adherent lines are seeded at roughly 5,000–20,000 cells per well in 100–200 µL. The right number depends on growth rate, assay length and the confluence you want at the end, so optimize for your cell line.
Can I enter numbers in scientific notation?
Yes. Type values like 1.5e6 for 1.5 × 10⁶ cells/mL. Commas such as 1,500,000 are also accepted.
What if the calculated stock volume is too small to pipette?
Make an intermediate dilution first, for example 1:10, then use the new concentration as C1 in the calculator. This gives larger, more accurate pipetting volumes.
Why does the calculator say my target concentration is too high?
Dilution can only lower concentration. If the desired concentration is higher than your stock, you need to concentrate the cells first – usually by centrifuging and resuspending the pellet in a smaller volume.
Should I use total or viable cell count?
Most protocols use the viable cell count (live cells/mL), because dead cells do not attach or grow. Use the value your protocol specifies for consistent results.